How to Host your Django StaticFiles and MediaFiles on DigitalOcean Spaces Object Storage

DigitalOcean is an American company providing cloud services, once you have created your Django app and you feel like it is complete and ready to be used you can deploy it to digital ocean.
In this tutorial we are going to use DigitalOcean Spaces Object Storage to host our static and media files to DigitalOcean.
If you do not have a DigitalOcean account you can create one using this link Create an account on DigitalOcean (This is a referral link if you sign up using this link me and you are going to benefit ), After you sign up you will receive a $100, 60-day credit.
We are going to be using a Django app I have prepared to demonstrate the whole process
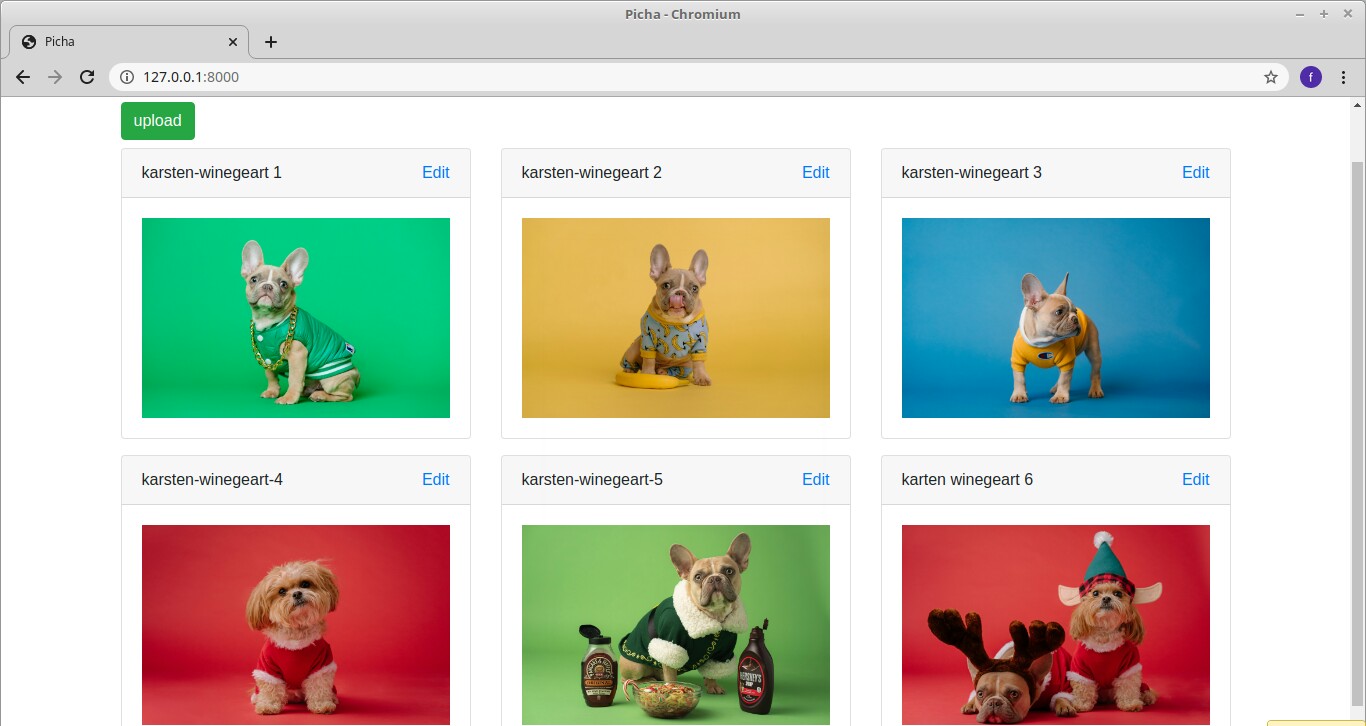
This is the app we will be using
Download or clone this app from github here : https://github.com/felix13/picha.git
Prerequisites
Before getting started , you will first need to install boto3 and django-storages, we will do so with the following commands
pip install boto3
pip install django-storages
After that, make sure storages is included in the installed apps section in the settings.py file , in our app it will look like this
INSTALLED_APPS = [
    'django.contrib.admin',
    'django.contrib.auth',
    'django.contrib.contenttypes',
    'django.contrib.sessions',
    'django.contrib.messages',
    'django.contrib.staticfiles',
    'storages',
    'picha',
]
You can see storages just before picha, Picha is a Django app that I created , it is a simple photo gallery app that is displaying the dog photos above.
( bytheway Picha is kiswahili word for picture )
Our views.py file is simple , it looks like this
from django.shortcuts import render, redirect, get_object_or_404

from picha.models import Picture
from picha.forms import PictureForm


def home(request):
    images = Picture.objects.all()
    return render(request, "picha/home.html", {'images': images})


def add_picture(request):
    form = PictureForm()
    if request.method == "POST":
        form = PictureForm(request.POST, request.FILES)
        if form.is_valid():
            form.save()
            return redirect('home')
    return render(request, "picha/picture_form.html", {'form': form})


def edit_picture(request, id):
    image = get_object_or_404(Picture, pk=id)
    form = PictureForm(instance=image)
    if request.method == "POST":
        form = PictureForm(request.POST, request.FILES, instance=image)
        if form.is_valid():
            form.save()
            return redirect('home')
    return render(request, "picha/picture_form.html", {'form': form})
Our models .py file looks like this
from django.db import models

class Picture(models.Model):
    name = models.CharField(max_length=20)
    image = models.ImageField()

    def __str__(self):
        return self.name
forms.py
from django import forms
from picha.models import Picture

class PictureForm(forms.ModelForm):
    name = forms.CharField(
       widget=forms.TextInput(attrs={'class': 'form-control'}),
       max_length=50)

    class Meta:
        model = Picture
        fields = ['name', 'image']
We also have two templates , home.html and picture_form.html
home.html looks like this
{% extends 'base.html' %}

{% block content %}
<div class="container">

  <div class="row">
    <div class="col-sm-8 my-2">
        <a href="{% url 'add_picture' %}" class="btn btn-success" >upload </a>
    </div>
  </div>

  <div class="row">
     {% for image in images %}
        <div class="col-md-4 mb-3">
          <div class="card">

            <div class="card-header">
             {{image.name}}
             <a class="float-right" href="{% url 'edit_picture' image.pk  %}">Edit</a>
            </div>

            <div class="card-body"><img style="width:100%;height:200px;" src="{{ image.image.url}}"></div>
          </div>
        </div>
        {% if forloop.counter|divisibleby:3 %}</div><div class="row">{% endif %}
     {% endfor %}
   </div>

</div>

{% endblock %}
In the above html file , you can see that each row will display three images
The other html file is picture_form.html
{% extends 'base.html' %}

{% block content %}

<div class="container">
  {% if form.instance.pk %}
     <h1 class='text-center'>Edit picture</h1>
  {% else %}
     <h1 class='text-center'>Upload picture </h1>
  {% endif %}
  <div class="row">
    <div class="col-md-4 offset-md-4">
      <form action="" method="post" enctype='multipart/form-data'>
        {% csrf_token %}
        {% for field in form %}
        <div class="form-group">
          {{ field.errors }}
          {{ field.label_tag }}
          {{ field }}
        </div>
        {% endfor %}

        <input type="submit" value="upload" class="btn btn-primary">
      </form>
    </div>
  </div>
</div>

{% endblock %}
Now DigitalOcean spaces configuration will be contained in two files
- A custom file we created called
custom_storages.py -
Settings.pyfile
custom_storages.py
This file is created on the same level as the manage.py file , by doing so we would not have to import the module in settings.py file.
We wrote our own storage class by inheriting S3Boto3Storage , our custom_storages.py file looks like this
from storages.backends.s3boto3 import S3Boto3Storage

class MediaStorage(S3Boto3Storage):

    location = 'mediafiles'

    file_overwrite = False


class StaticStorage(S3Boto3Storage):

    location = 'staticfiles'

    file_overwrite = False
The above code will make sure that all static files and media files will be copied to a folder called staticfiles and mediafiles respectively when python manage.py collectstatic command is run, the folders will be created automatically in our bucket.
You will see how we will create our bucket in DigitalOcean later, think of a bucket as our parent folder in DigitalOcean that will contain staticfiles and mediafiles.
file_overwrite = False simply means do not overwrite files with same name
Settings.py
Our settings.py file will have the following settings
AWS_ACCESS_KEY_ID = 'SHV2ECOPTCLELSUV5A3Y'

AWS_SECRET_ACCESS_KEY = 'QPC2q9h4ql12K3uHkQ4xeTqPjTdImXDOe/YOgnmCiLs'

AWS_STORAGE_BUCKET_NAME = 'our-project-space'

AWS_S3_ENDPOINT_URL = 'https://our-project-space.nyc3.digitaloceanspaces.com'

AWS_S3_OBJECT_PARAMETERS = {
    'CacheControl': 'max-age=86400',
}

AWS_DEFAULT_ACL = 'public-read'

AWS_S3_SIGNATURE_VERSION = 's3v4'

STATIC_URL = 'https://%s/%s/' % (AWS_S3_ENDPOINT_URL, 'staticfiles')

MEDIA_URL =  'https://%s/%s/' % (AWS_S3_ENDPOINT_URL, 'mediafiles')

STATICFILES_STORAGE =  'custom_storages.StaticStorage'

DEFAULT_FILE_STORAGE = 'custom_storages.MediaStorage'
AWS_ACCESS_KEY_ID
This is Amazon Web Services access key, I will show you how to get this value from DigitalOcean.
AWS_SECRET_ACCESS_KEY
This is your Amazon Web Services secret access key, we will also learn how to get this value from DigitalOcean
AWS_STORAGE_BUCKET_NAME
This is your Amazon Web Services storage bucket name , In our example our bucket name is 'our-project-space', you can set this name in DigitalOcean.
AWS_S3_ENDPOINT_URL
This is the URL that will be used to access our remote DigitalOcean space, this we will get from DigitalOcean
AWS_S3_OBJECT_PARAMETERS
This is used to set parameters on all objects, in our example we have
'CacheControl': 'max-age=86400'
Here we are simply setting how long in seconds content stays in the cache
AWS_DEFAULT_ACL
This is set to 'public-read' which ensures that the files will be publicly accessible to end users.
AWS_S3_SIGNATURE_VERSION
Here we are specifying signature version to use, we will be setting it to 's3v4' since all regions support V4.
STATIC_URL
This points to the URL where our static files will be located in our DigitalOcean bucket , the value you use here should be the same as the one declared in custom_storages.py .
In our custom_storages.py our static files are set to be located in a directory called 'staticfiles' so we are going to use that and join it with our AWS_S3_ENDPOINT_URL like so
So our STATIC_URL will be :
'https://%s/%s/' % (AWS_S3_ENDPOINT_URL, 'staticfiles')
MEDIA_URL
This is similar to STATIC_URL setting above but now the location will be mediafiles just like it is in custom_storages.py file and now the whole thing would look like
'https://%s/%s/' % (AWS_S3_ENDPOINT_URL, 'mediafiles')
STATICFILES_STORAGE
This setting will allow python manage.py collectstatic command to automatically put our static files in our bucket .
In our case we wrote our own storage class by inheriting S3Boto3Storage , now we are going to point to our class like this
STATICFILES_STORAGE = 'custom_storages.StaticStorage'
DEFAULT_FILE_STORAGE
This is the same as STATICFILES_STORAGE setting above but now we will set it to point to our MediaStorage class in our custom_storage.py file
GETTING THE VALUES WE NEED FROM DIGITALOCEAN
The next step now is getting the values we need from DigitalOcean , we will use those in our settings.py and complete our setup
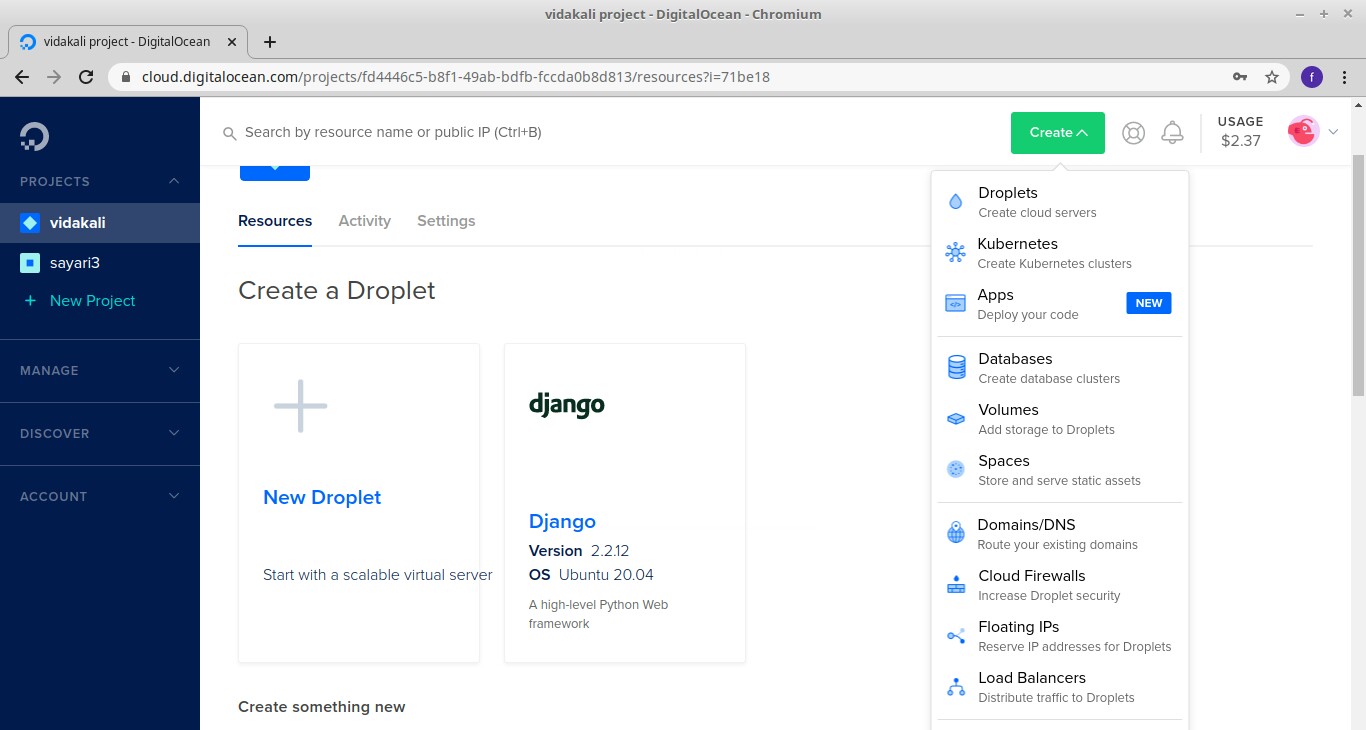
After creating your DigitalOcean account, log in and click on the green button labeled create and then click on space
You will land on a page that looks like this
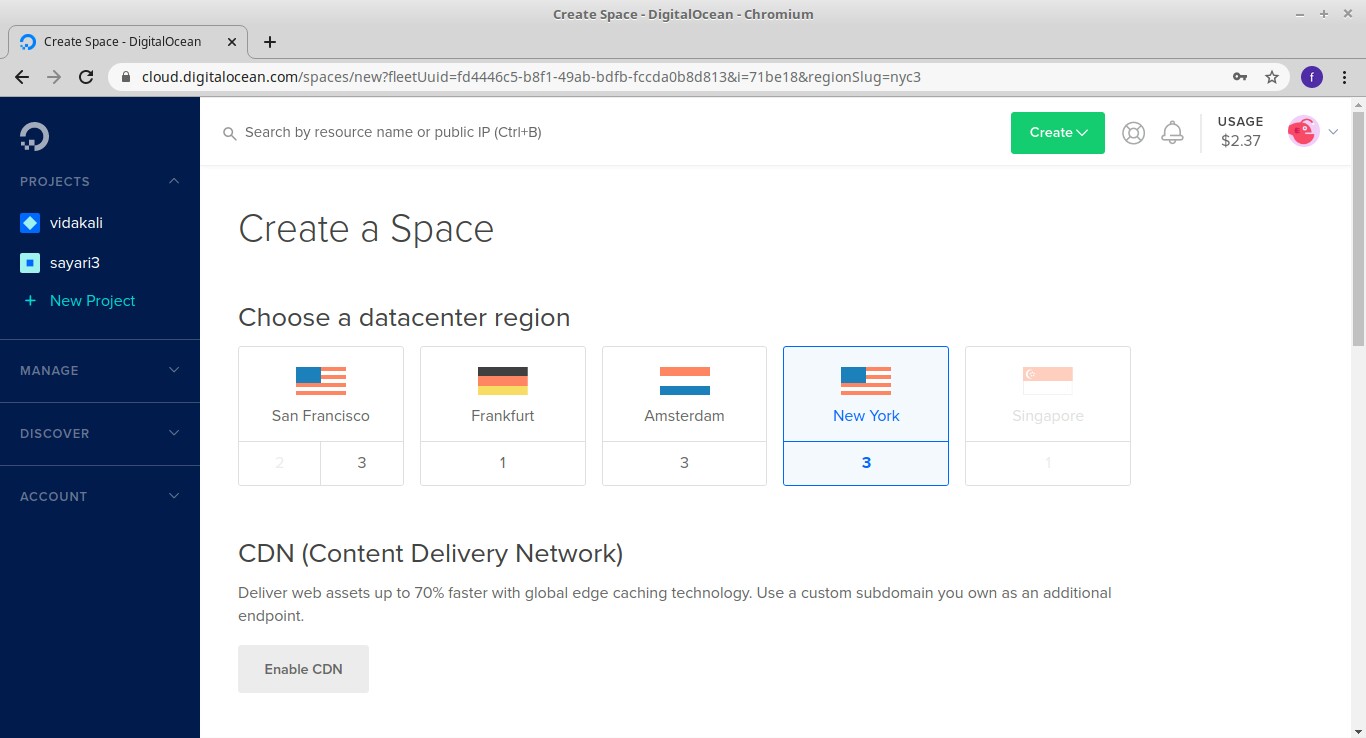
Chose your datacenter I chose New York
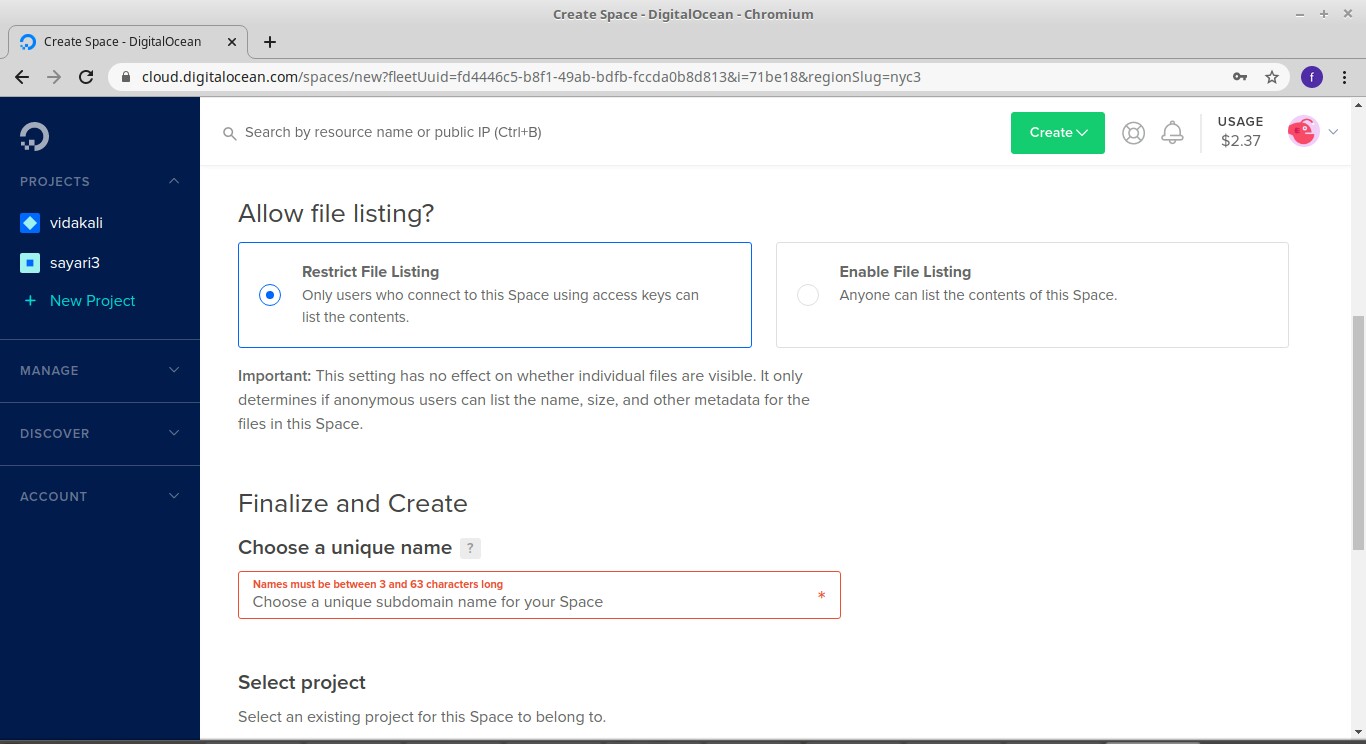
Scroll down , skip the CDN part since we will not be using CDN in this tutorial, leave Allow File listing the way it is, it is always set as Restrict file listing.
Create a unique name for your space here, the name I chose was our-project-space and click create space
The next page after creating our DigitalOcean space looks like this
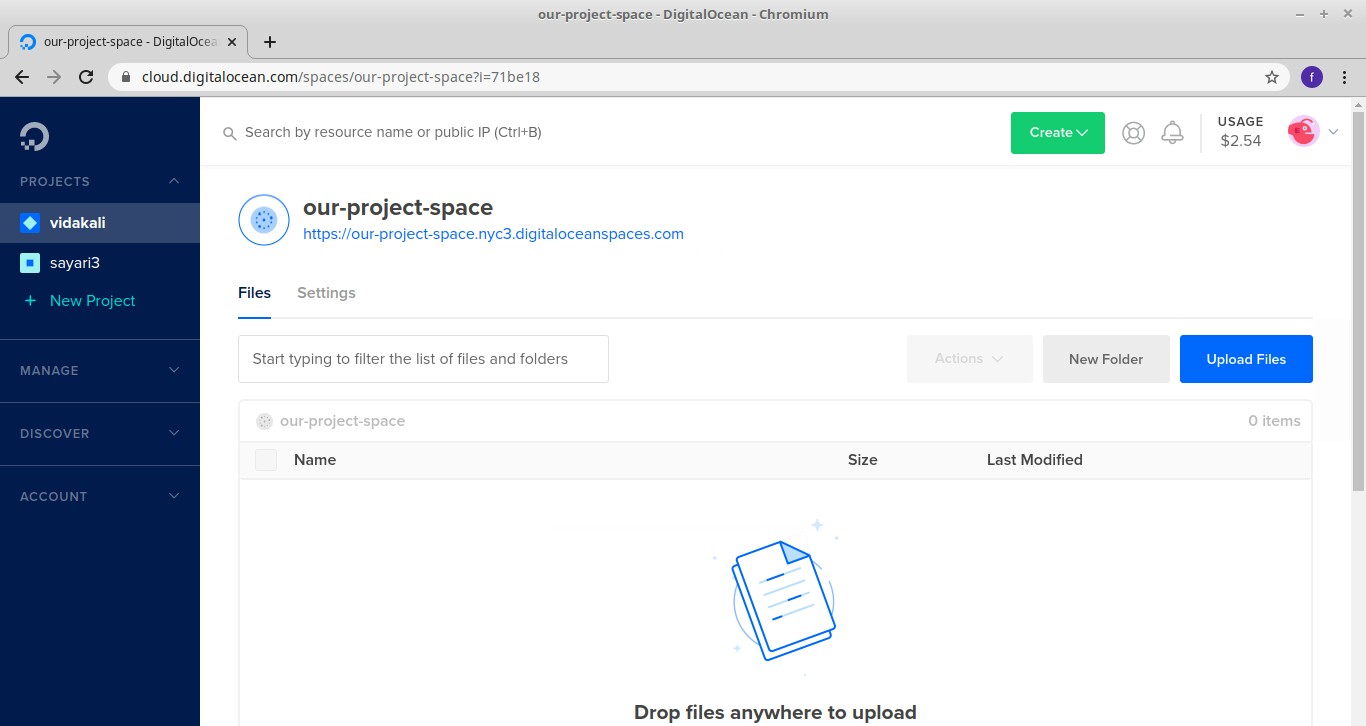
Click on New Folder , here what we want to do is to create our folder where all our files will be dumped, this will be our AWS_STORAGE_BUCKET_NAME , basically this is a bucket where our static files and media files will be located.
The folders mediafiles and staticfiles will be created automatically inside this bucket just as we declared in STATICFILES_STORAGE and DEFAULT_FILE_STORAGE
I named mine our-project-space , I chose same name for my space and bucket name.

The above photo shows the folder I created , type the name of your bucket there , my bucket name again was our-project-space
Next what we need is AWS_ACCESS_KEY_ID and AWS_SECRET_ACCESS_KEY, click on the API on your side bar , scroll down to spaces access keys
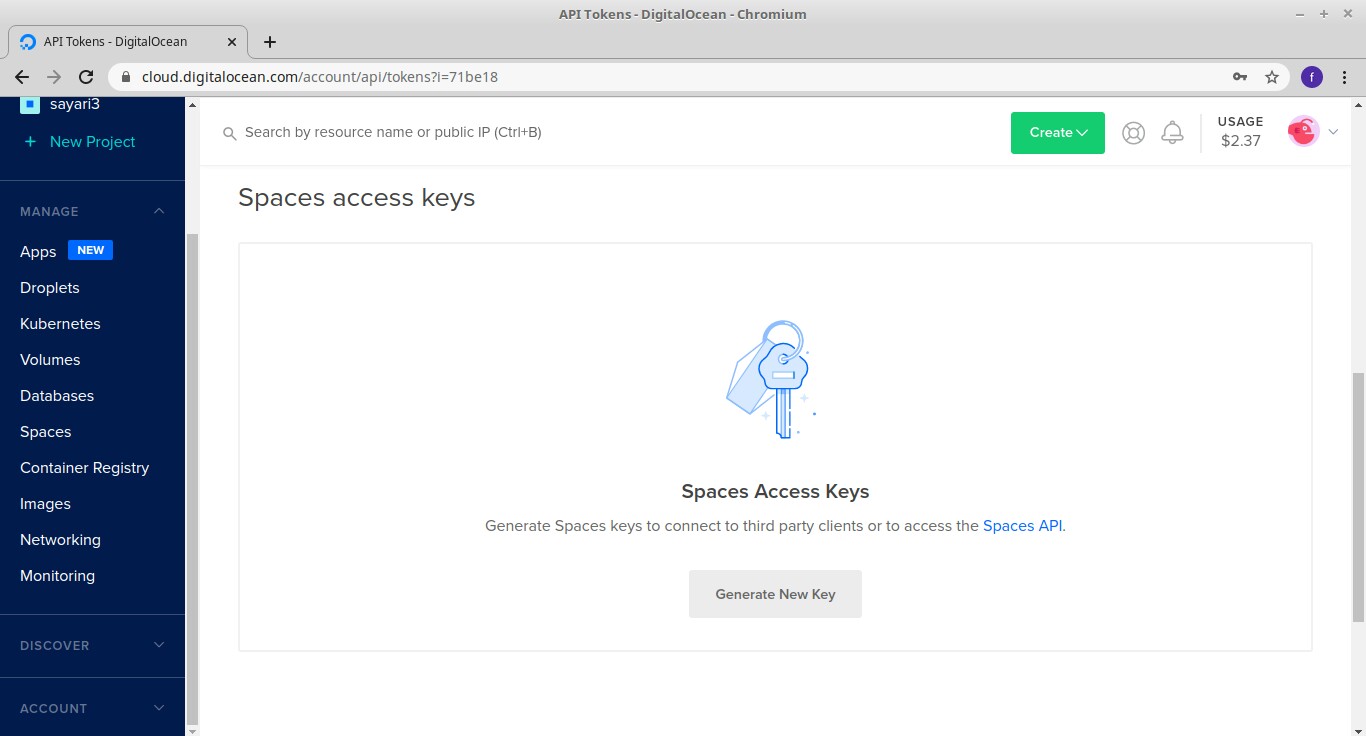
Click generate new key
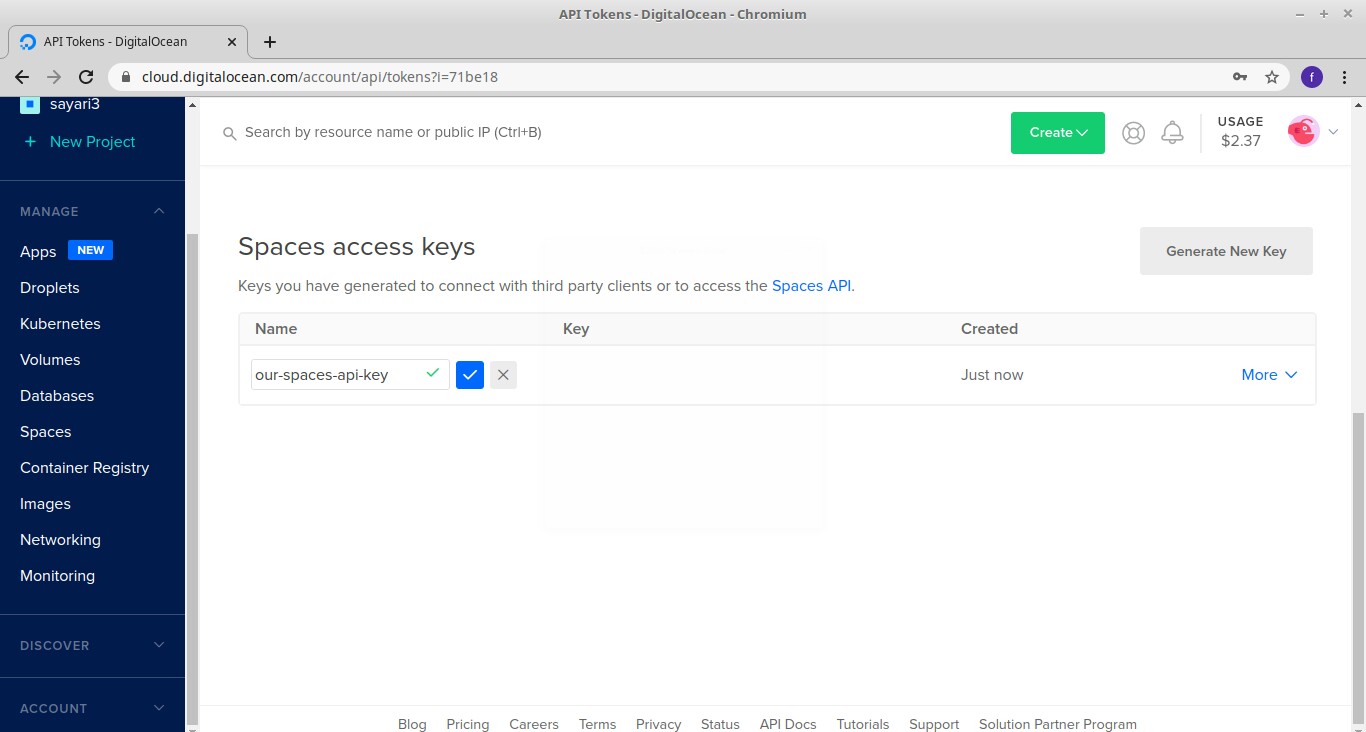
Give our spaces access key a name as shown below after that click the check mark and your keys will be generated
After naming your key and clicking the check mark you will see the following page
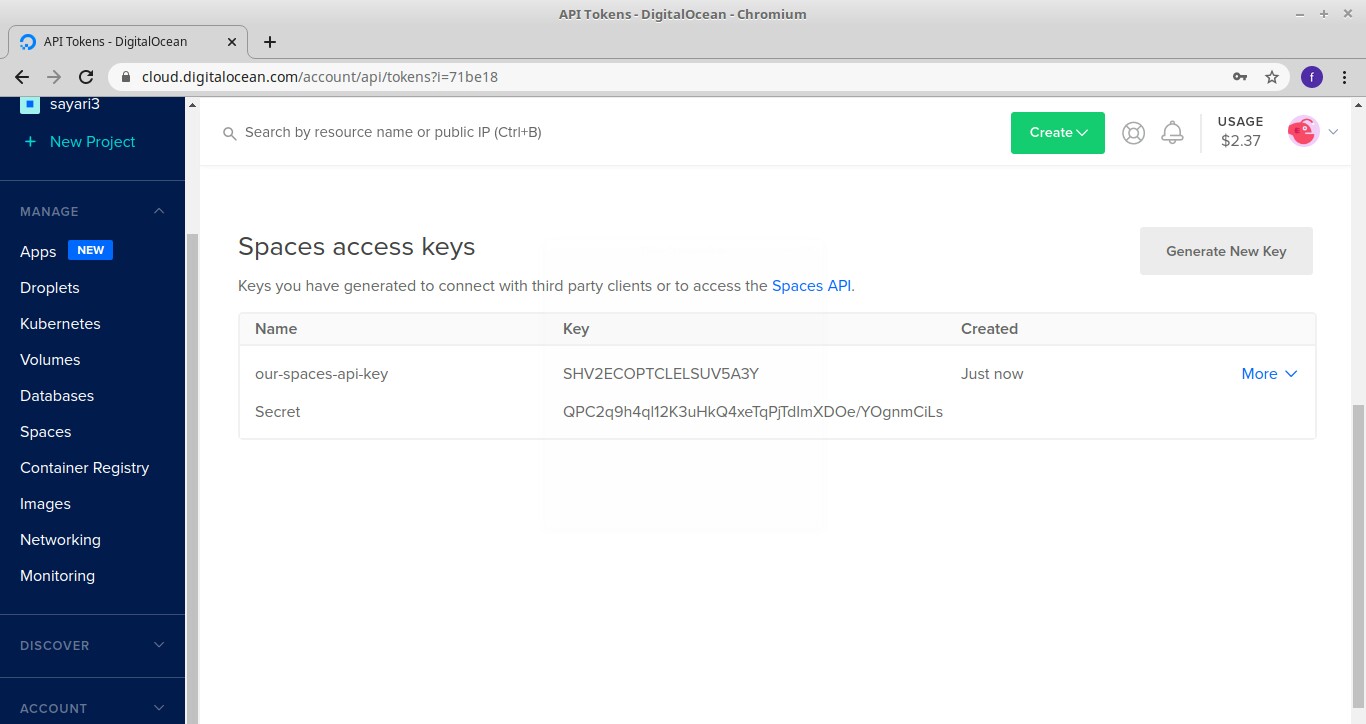
You need now to copy the Secret key and put it somewhere on your local computer since these will disappear if you refresh the page and you will have to regenerate them again.
( Note: I will be deleting the above access keys , this was just for demonstration purposes )
Now we have everything we need, it is now time to test whether it is working.
I have already prepared a Django app for you to test this , you can find it here : https://github.com/felix13/picha
Clone or download it, go to the settings.py file
AWS_ACCESS_KEY_ID = 'SHV2ECOPTCLELSUV5A3Y'

AWS_SECRET_ACCESS_KEY = 'QPC2q9h4ql12K3uHkQ4xeTqPjTdImXDOe/YOgnmCiLs'

AWS_STORAGE_BUCKET_NAME = 'our-project-space'

AWS_S3_ENDPOINT_URL = 'https://our-project-space.nyc3.digitaloceanspaces.com'

AWS_S3_OBJECT_PARAMETERS = {
    'CacheControl': 'max-age=86400',
}

AWS_DEFAULT_ACL = 'public-read'

AWS_S3_SIGNATURE_VERSION = 's3v4'

STATIC_URL = 'https://%s/%s/' % (AWS_S3_ENDPOINT_URL, 'staticfiles')

MEDIA_URL =  'https://%s/%s/' % (AWS_S3_ENDPOINT_URL, 'mediafiles')

STATICFILES_STORAGE =  'custom_storages.StaticStorage'

DEFAULT_FILE_STORAGE = 'custom_storages.MediaStorage'
After we generated our access keys, we were given two keys , a shorter one with few characters and a longer one .
The shorter one will be our AWS_ACCESS_KEY_ID
The longer one will be our AWS_SECRET_ACCESS_KEY
AWS_STORAGE_BUCKET_NAME set your bucket name here , mine was our-project-space
Next value is AWS_S3_ENDPOINT_URL, to get this value, you can click manage on your side bar , then spaces and then you will see a page like this
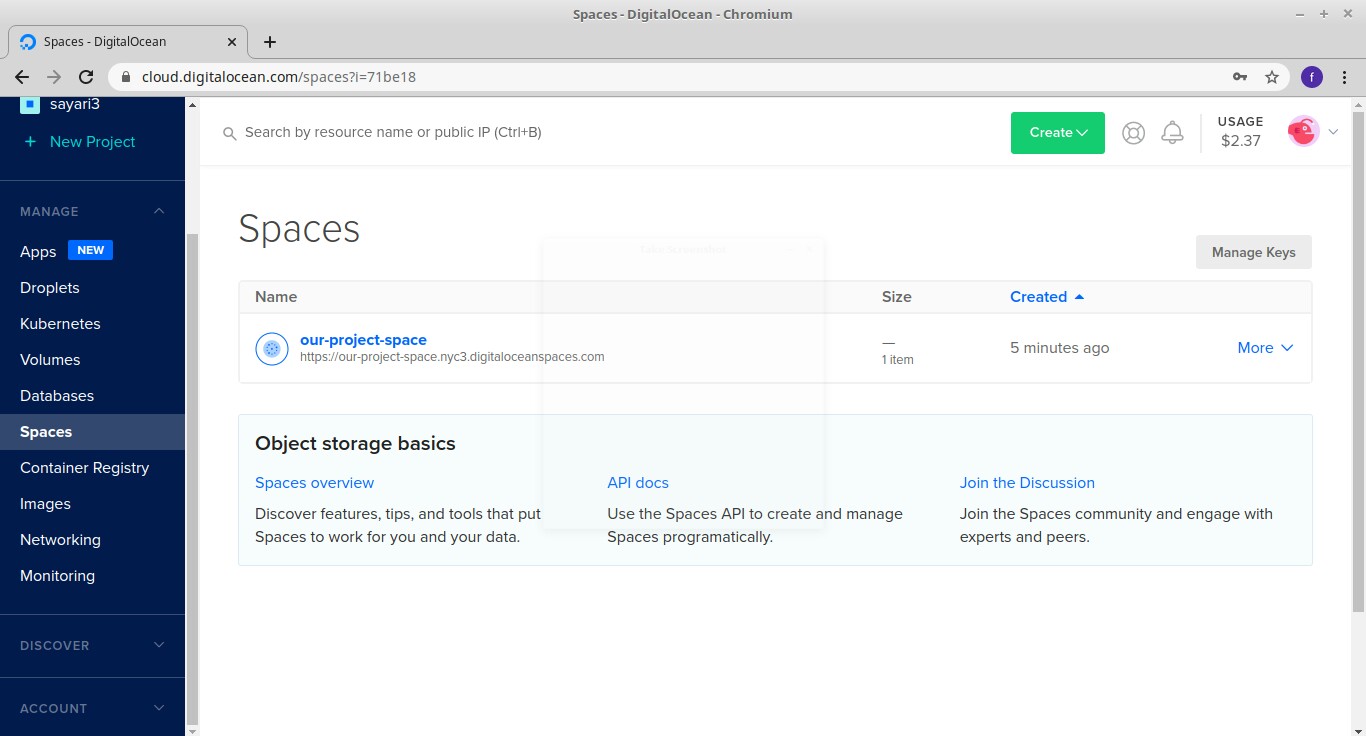
If you look closely you will see this link:
https://our-project-space.nyc3.digitaloceanspaces.com below our-project-space name
That is the value that we will use as our AWS_S3_ENDPOINT_URL
Leave the rest of the settings as they are, Now it is time for us to test if it works
Go to your root direactory, and type this command
python manage.py collectstatic
This command will push all our static files to our DigitalOcean bucket and create these two files inside of our bucket
- staticfiles
- mediafiles
The static files will be going to staticfiles directory and the media files will be going to mediafiles directory.
Lets now start our server with the following command
python manage.py runserver
Upload a few images and your app should look somthing like this

If you right click on one of the images and click view ( in firefox browser ) , you can see the image URL points to DigitalOcean. if you are using chrome you can inspect the image and check the URL of image.
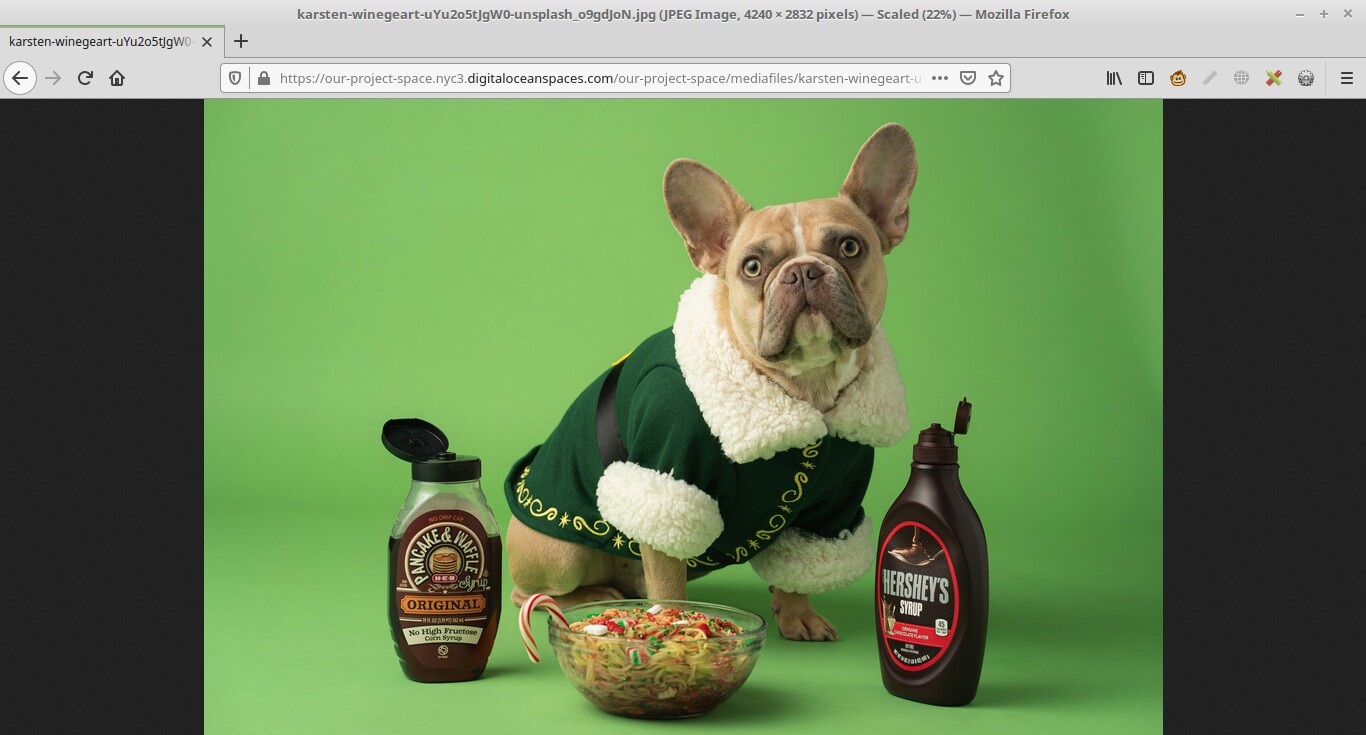
If you look closely at the URL of this image , you will see that it is hosted in DigitalOcean.

RESOURCES
Dog photos were provided by @karsten116 on unsplash
Keep Learning
- Why the name of this blog is Sayari3
- What are python args and kwargs
- How Does Django and Celery Work